Adding Premium CDN to any WordPress website
In this tutorial, let's see how we can configure Bunny CDN on any website which is wordpress based.
Ticket :
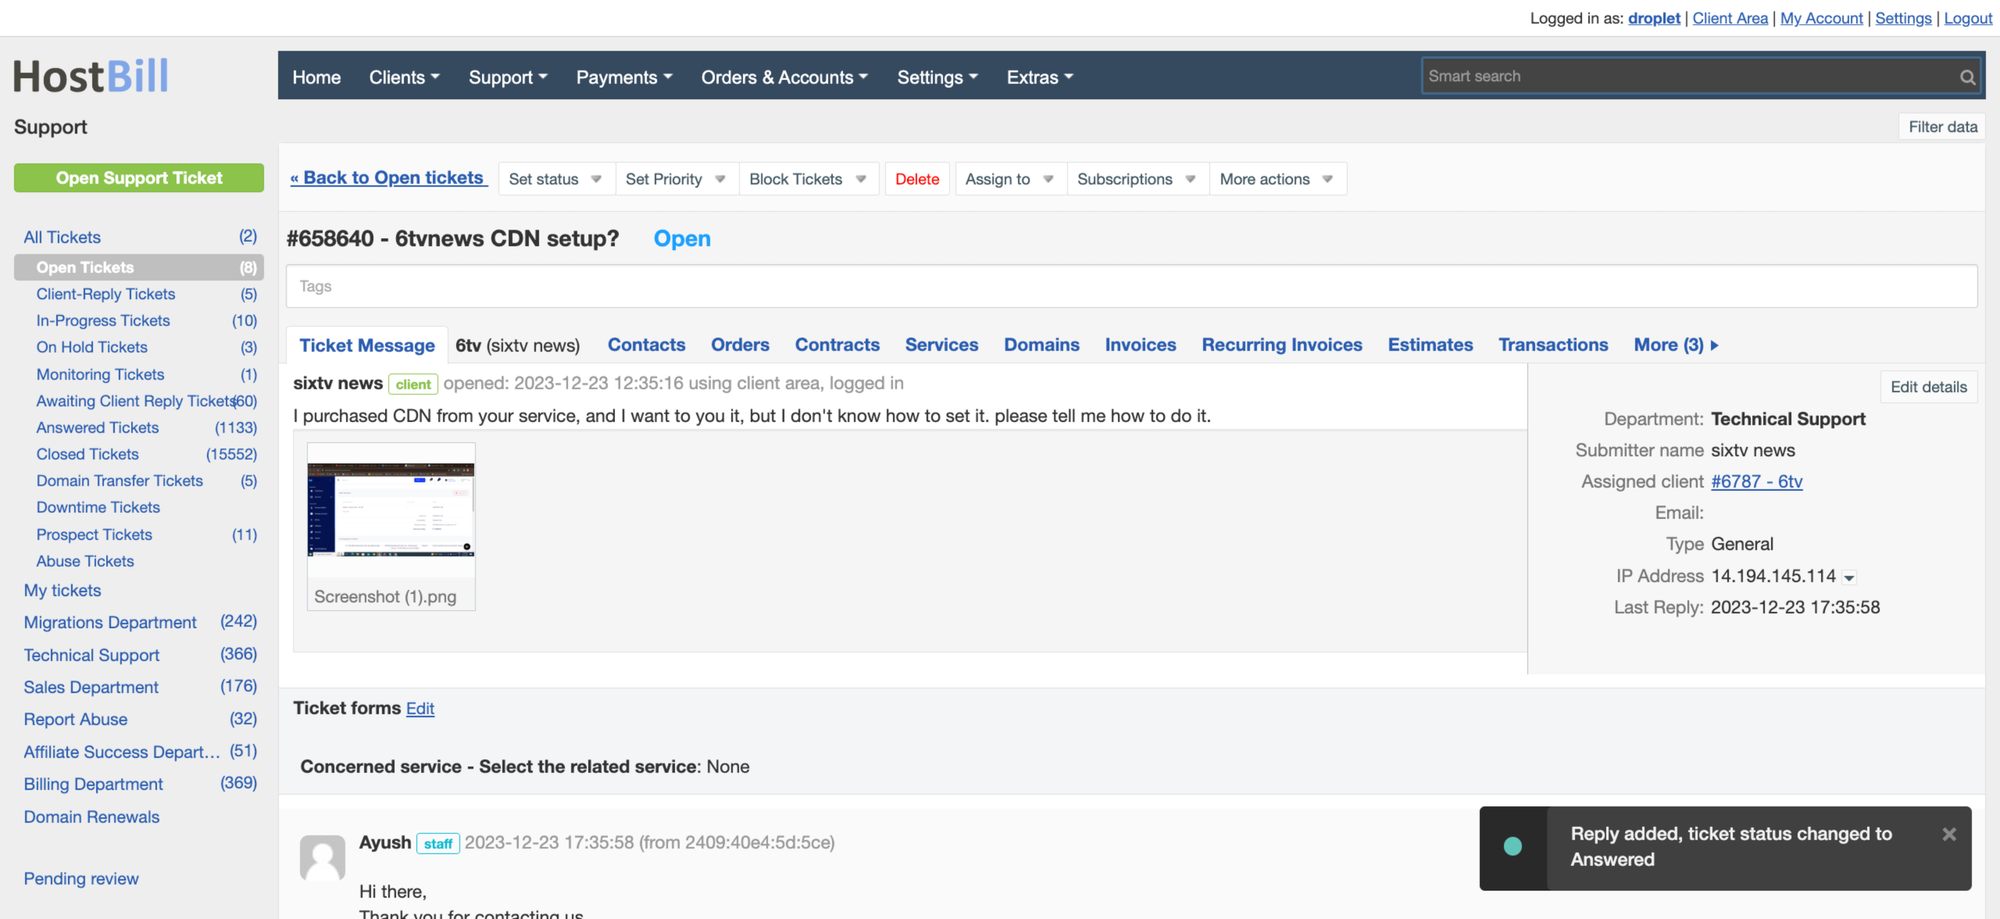
This is the ticket where we have been
Step 1 : Login to wp admin of the website where CDN has to be enabled.
First login to control panel, then go to wordpress section then login into wordpress of the concerned website.
After logged in , go to
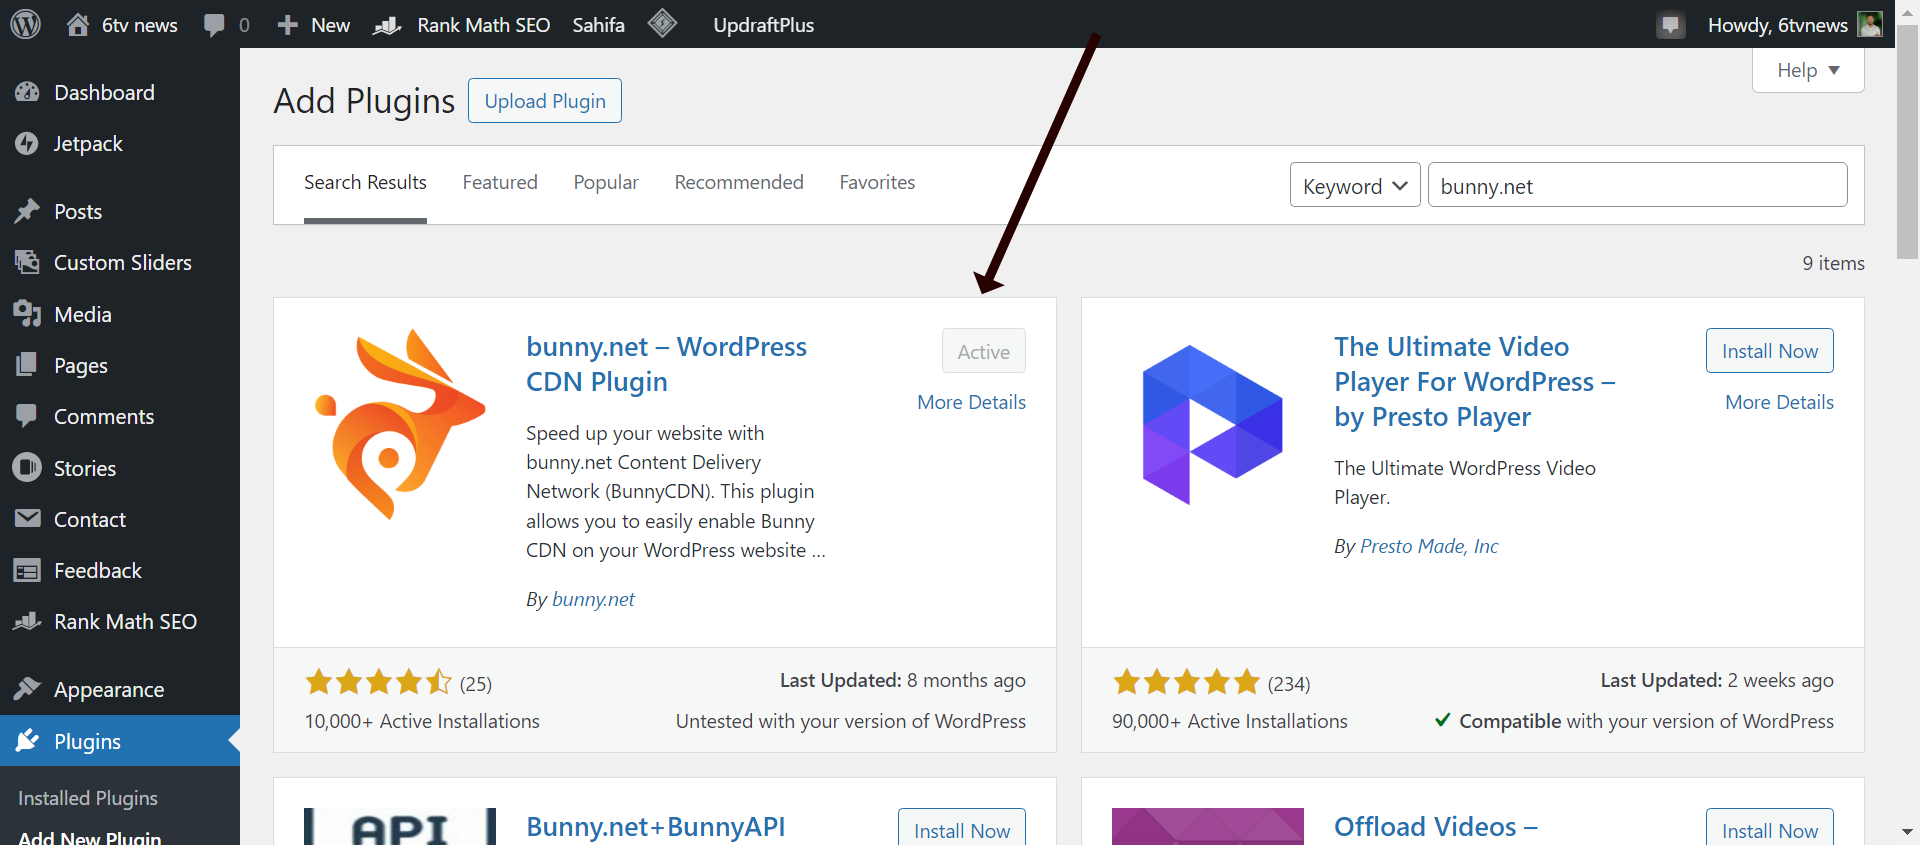
Plugins > Add new > Search for "bunny.net"
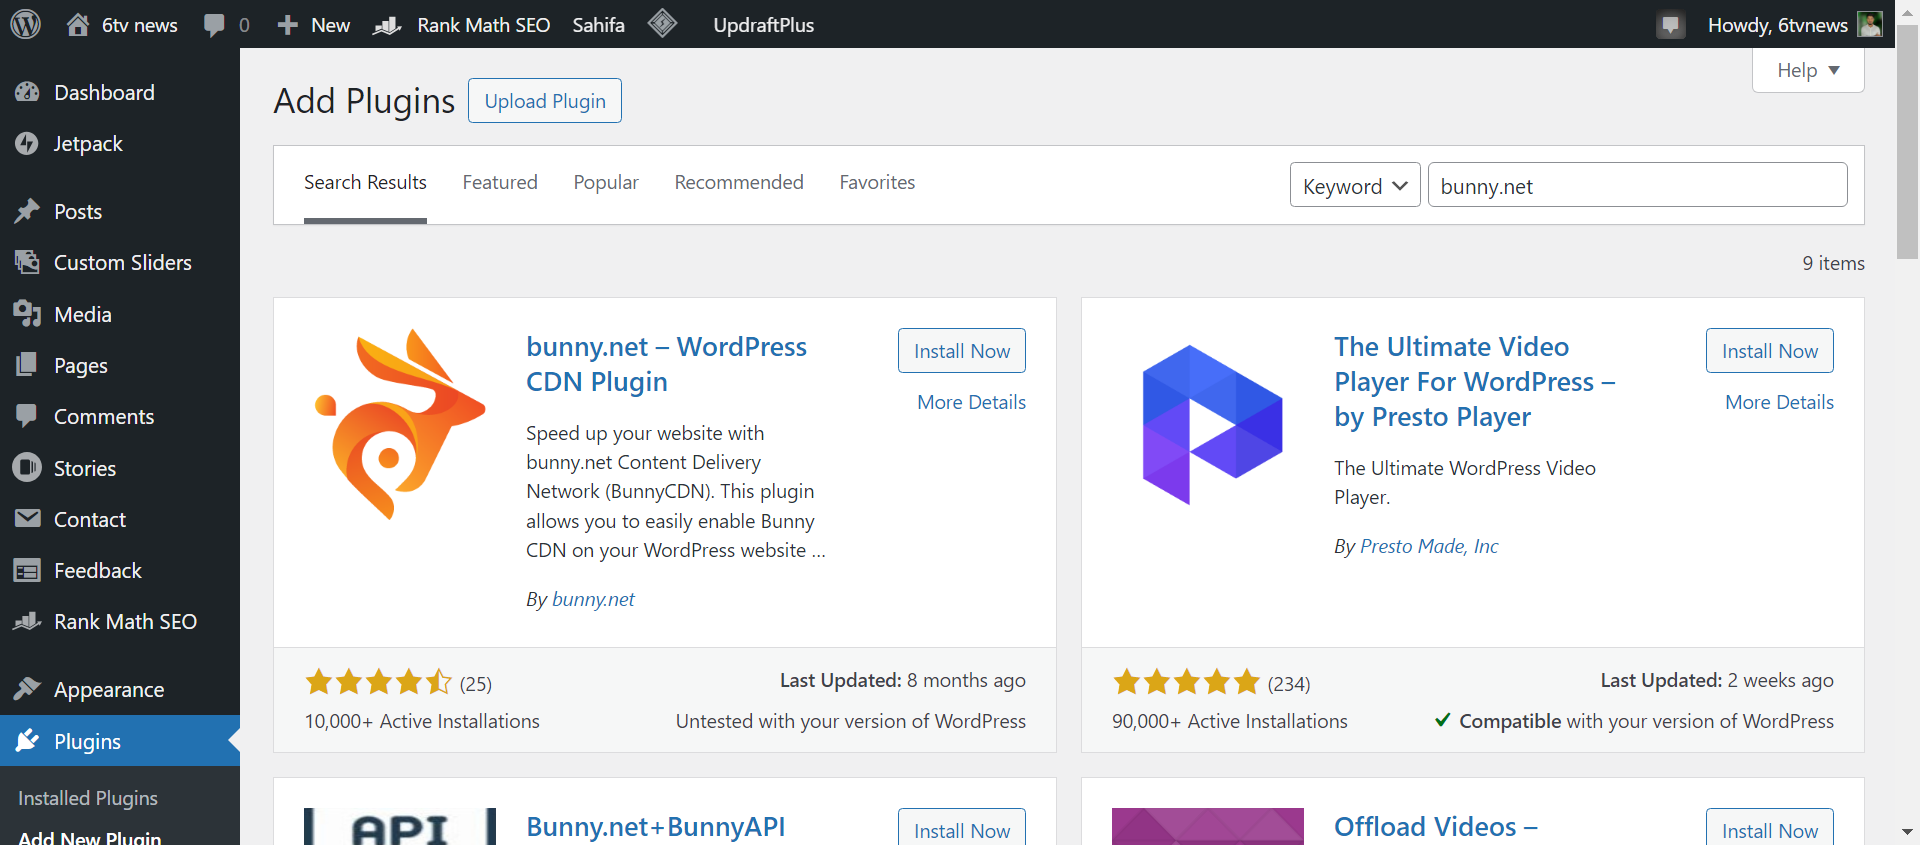
Install and activate the plugin as shown
Next, go ahead to the bunny.net dashboard and login, after login click this link
https://dash.bunny.net/cdn/add
Add a zone name something similar to the website name
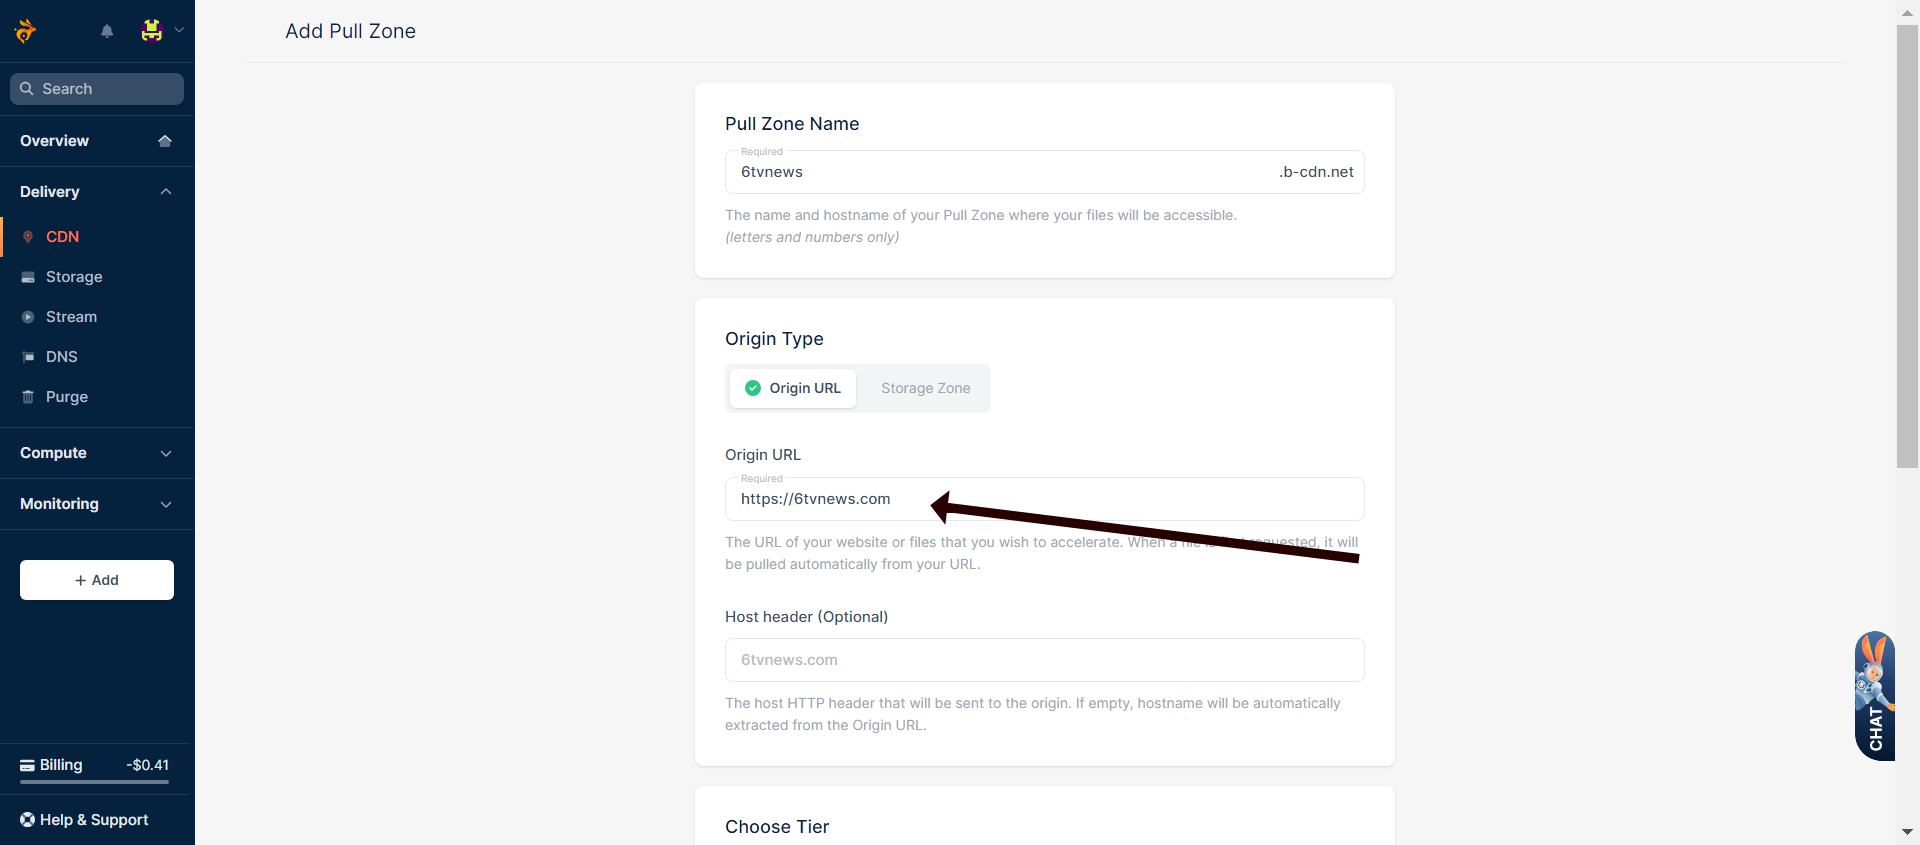
Enter the website URL as shown.
Next click on Add Pull Zone button
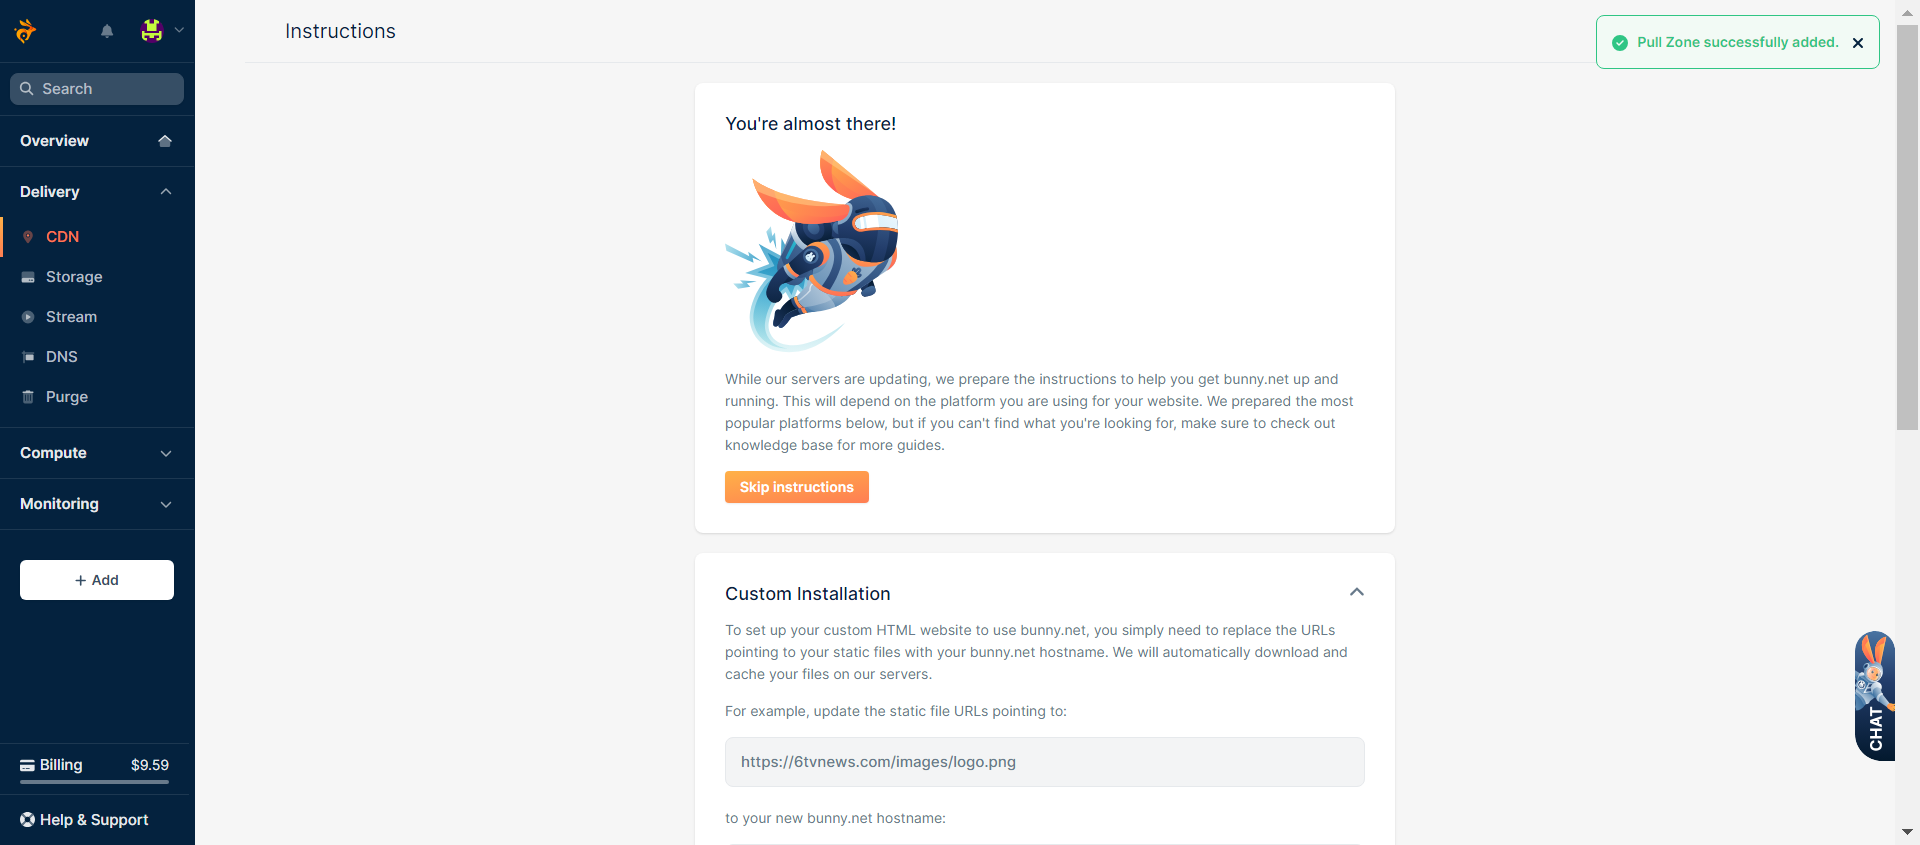
You will see this screen
Scroll down to Wordpress and then copy the pull zone name

Paste the pull zone name in the WordPress dashboard as shown
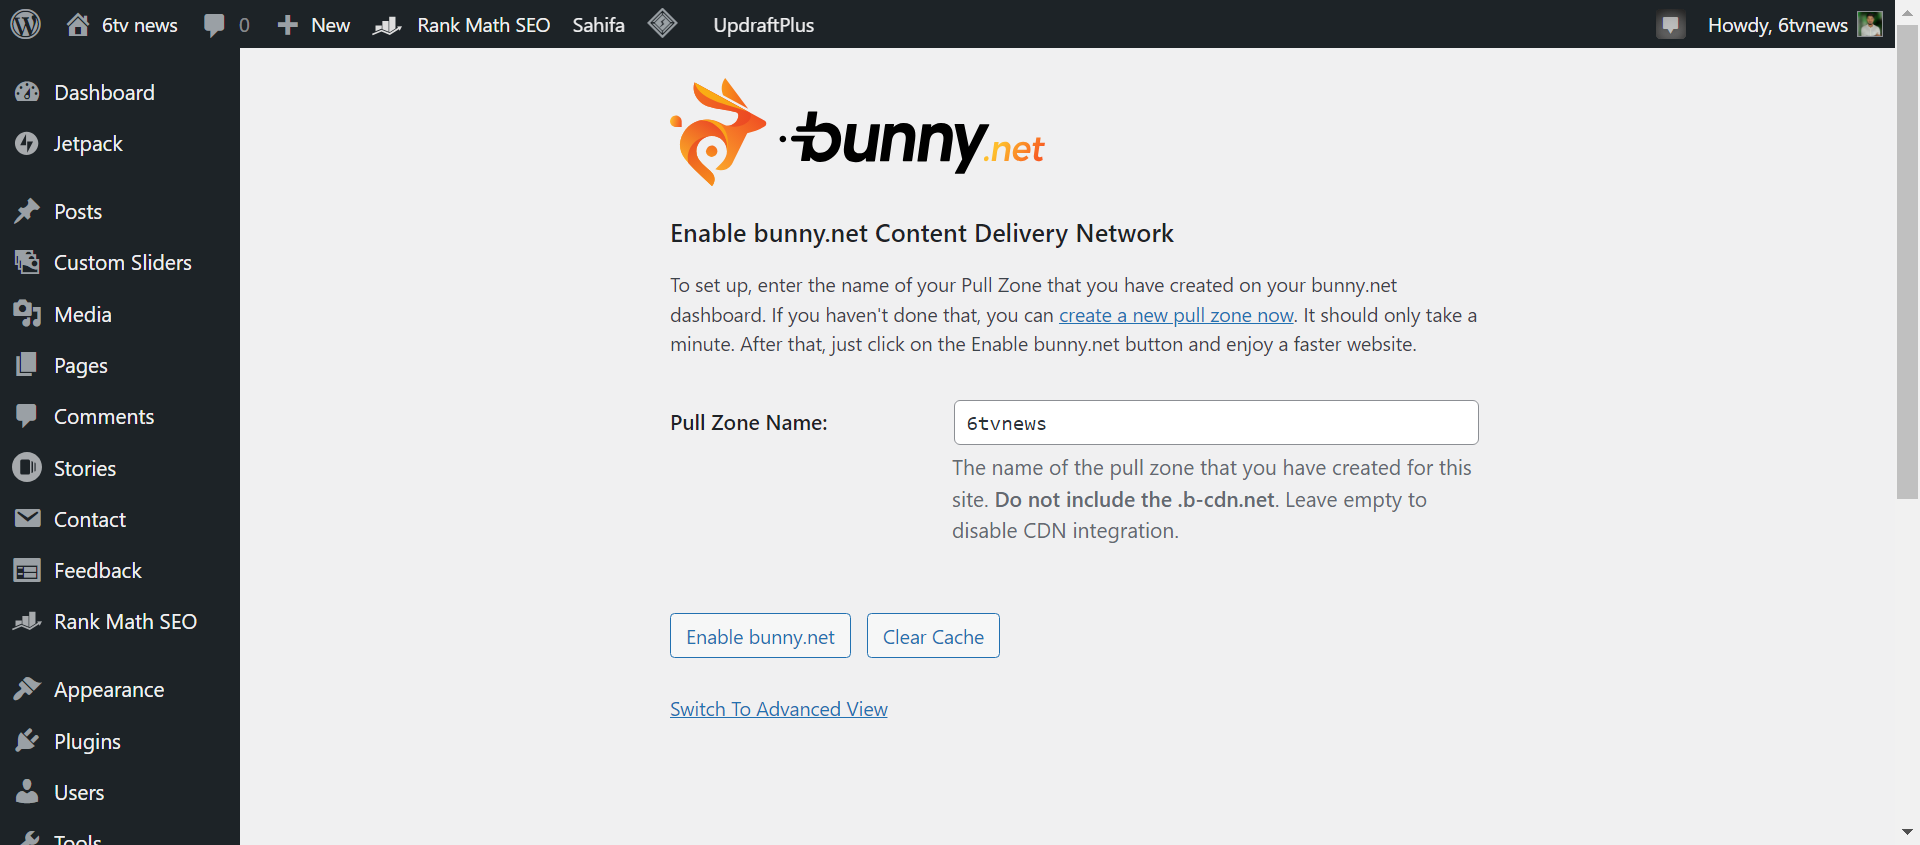
Now, click on Enable Bunny cdn
After that visit the website and click Ctrl + U To open the view source window as shown
Search for b-cdn using ctrl +F and typing b-cdn
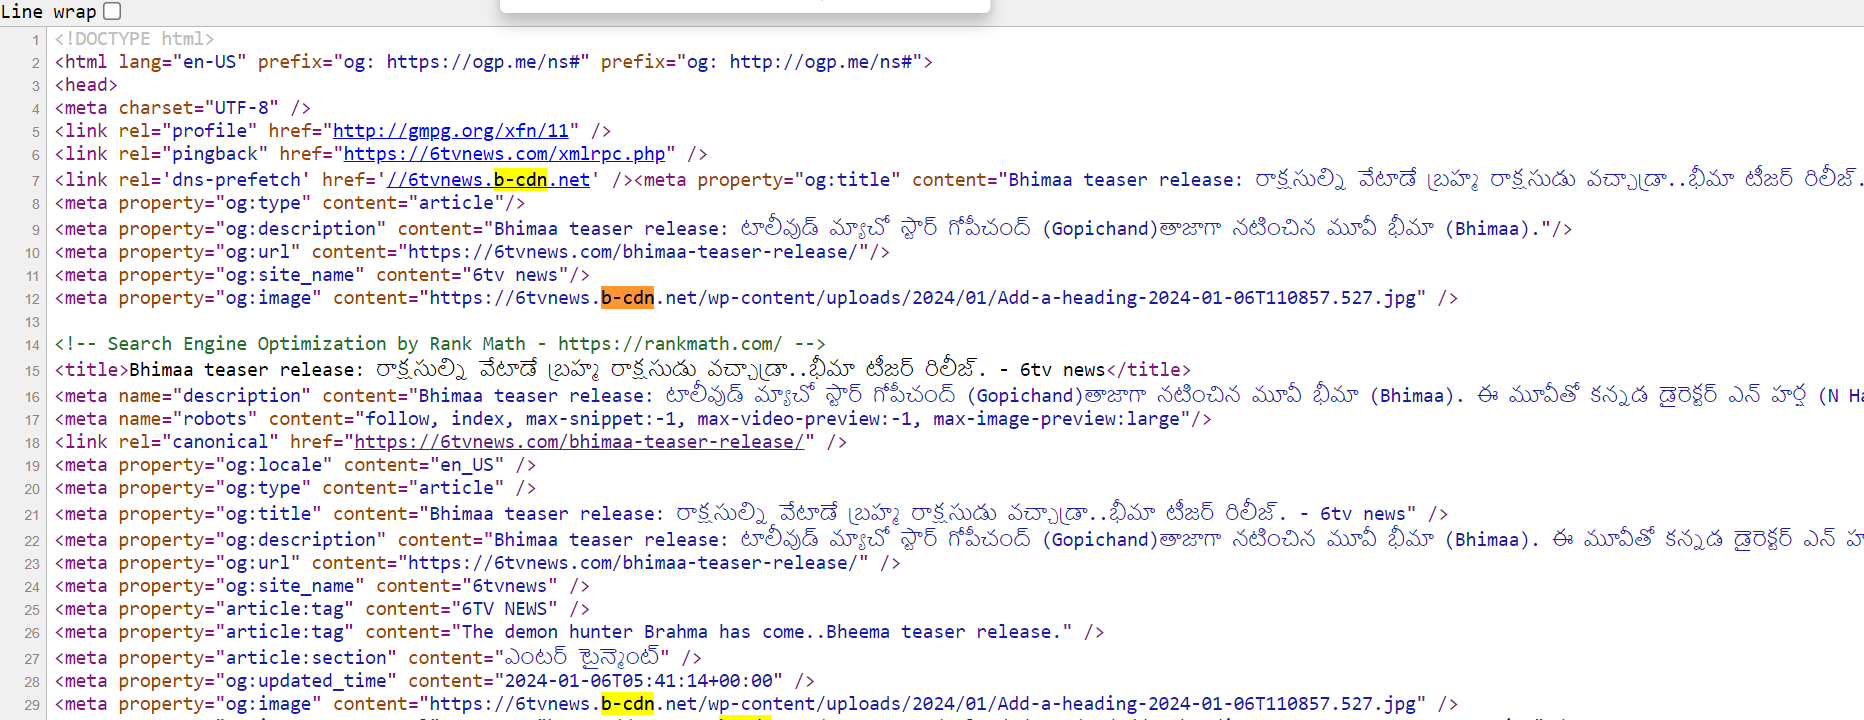
If you see entries as shown above, then CDN is successfully activated on the website now